How to Replace a Fan for Projector
Introduction
As the projector heats up due to lamp use and processor heat, the fan speeds up to circulate cool air throughout the interior of the projector, and push hot air outside, so that the projector can continue to operate normally and not become damaged from overheating. So it is so important to have a good working fan on projector. But how should we replace a fan? Let’s use InFocus LP435Z as example.
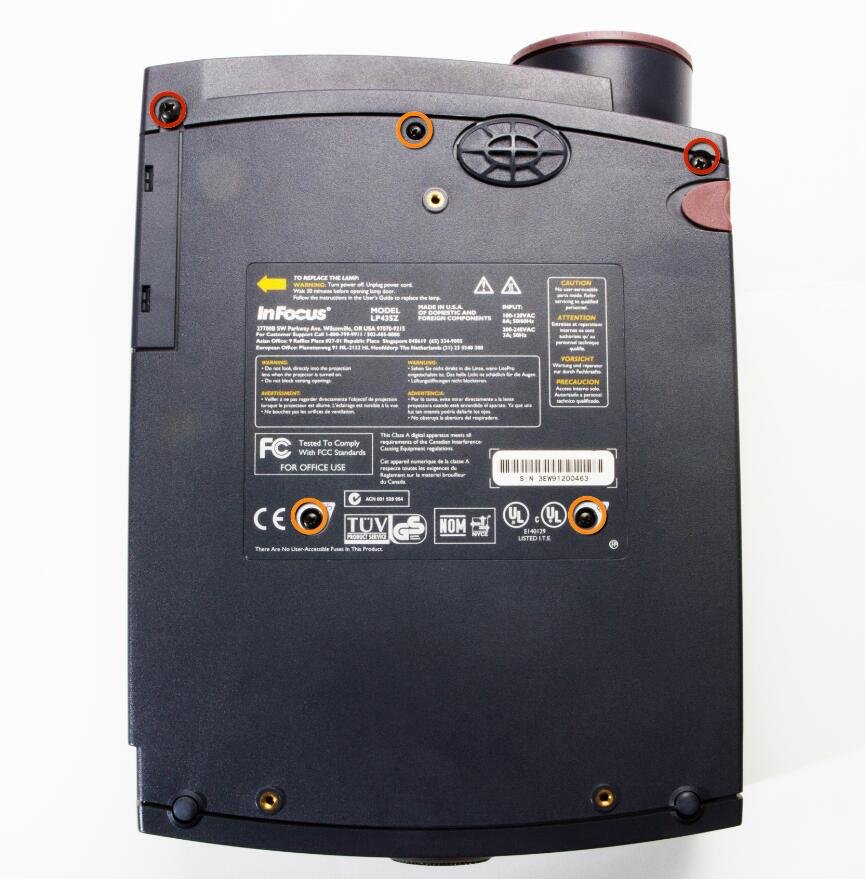
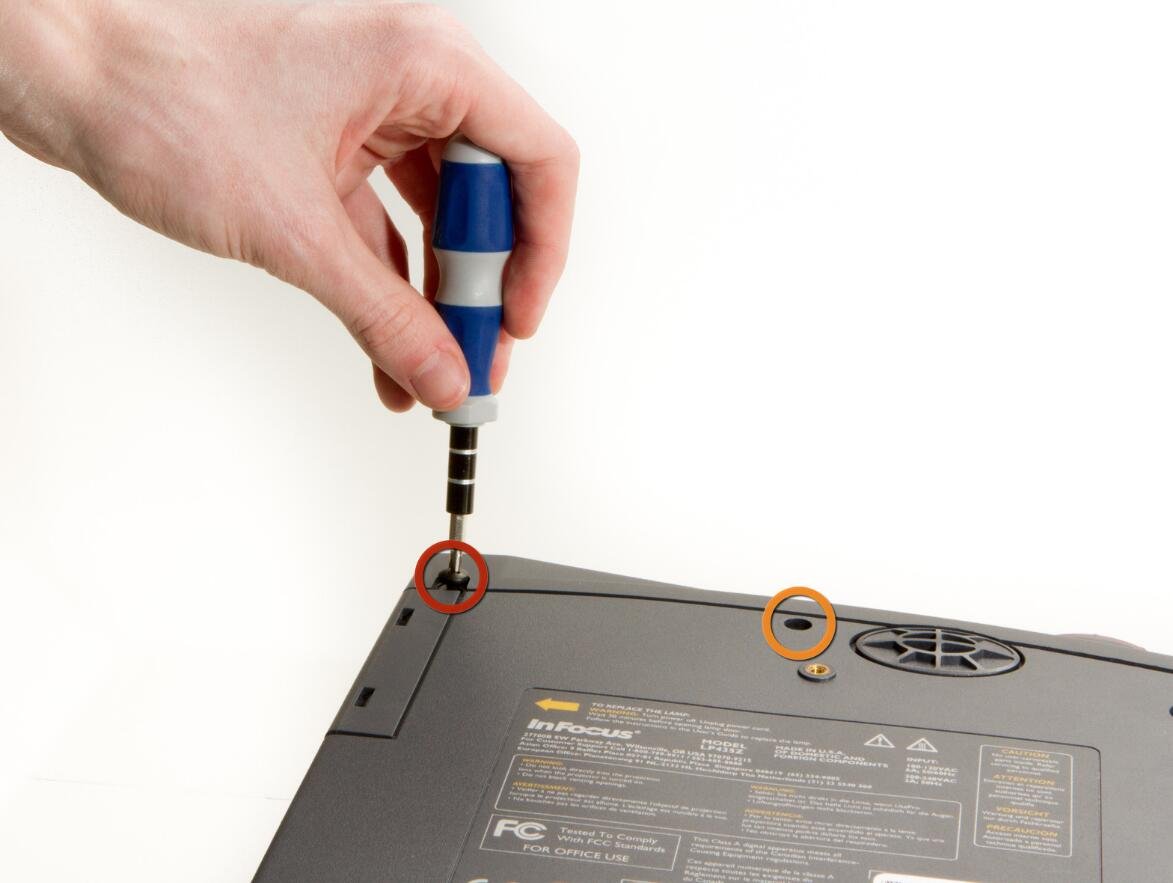
Step 1 External Shell
l Place the projector on its back (buttons down) with the lens facing away from you.
l Remove the two 84mm screws in the upper left and right corners of the projector (using the Phillips #2 screwdriver).
l Remove the remaining three 8.5mm screws (using the Phillips #1 screwdriver).
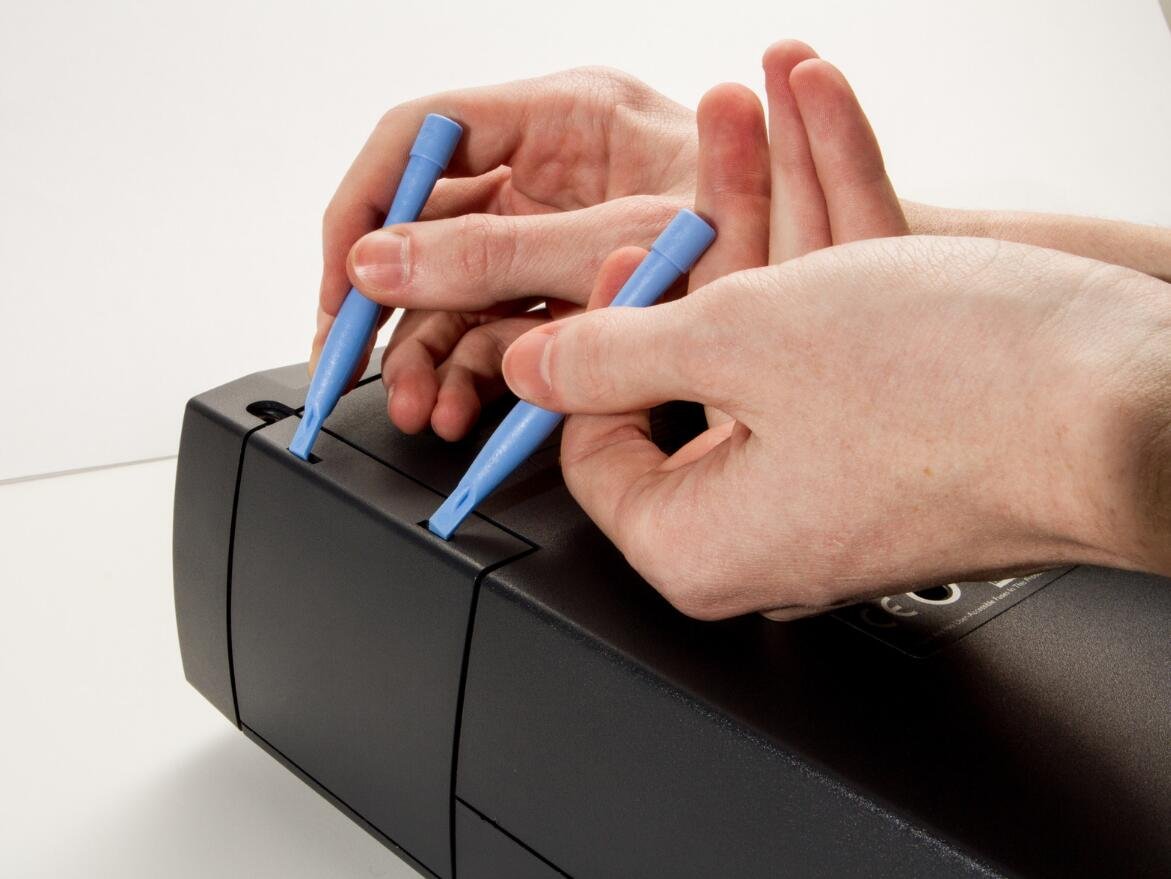
Step 2
l Use the plastic opening tools to push down the clips holding the lamp cover in place, and remove it.
There is no lamp assembly in the projector used in this guide, yours may appear different.
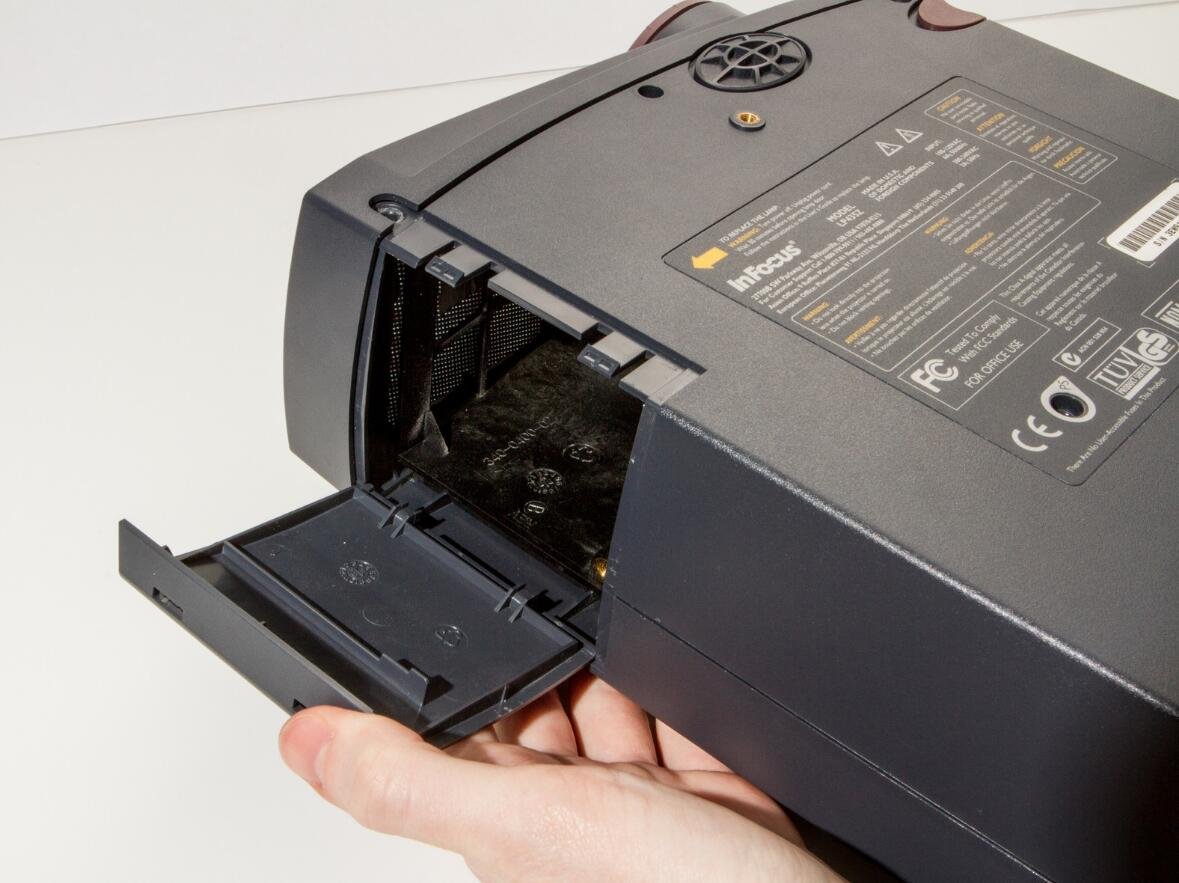
Step 3
l Remove the two 8.5mm rear screws holding the rear case plate to the projector using the Phillips #1 screwdriver.
l Pull the rear plate straight off and set it aside.
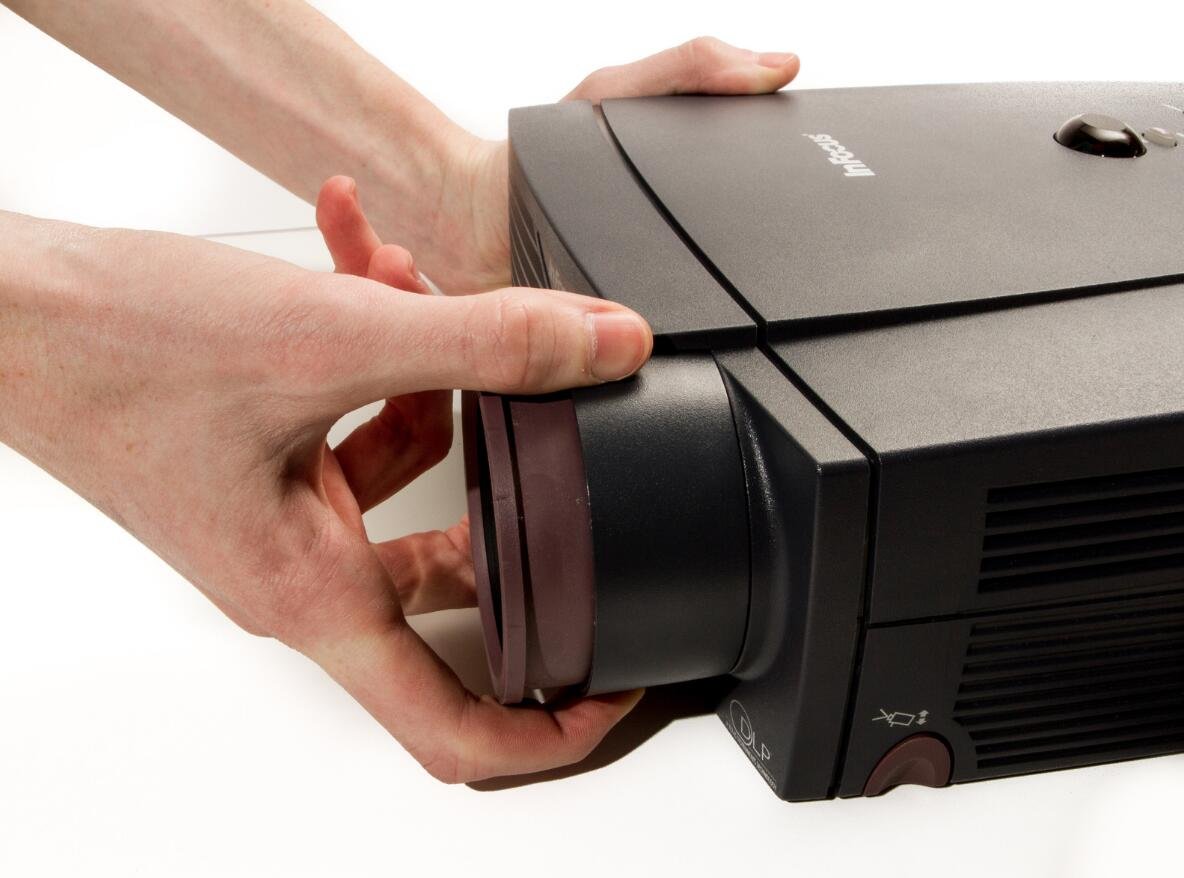
Step 4
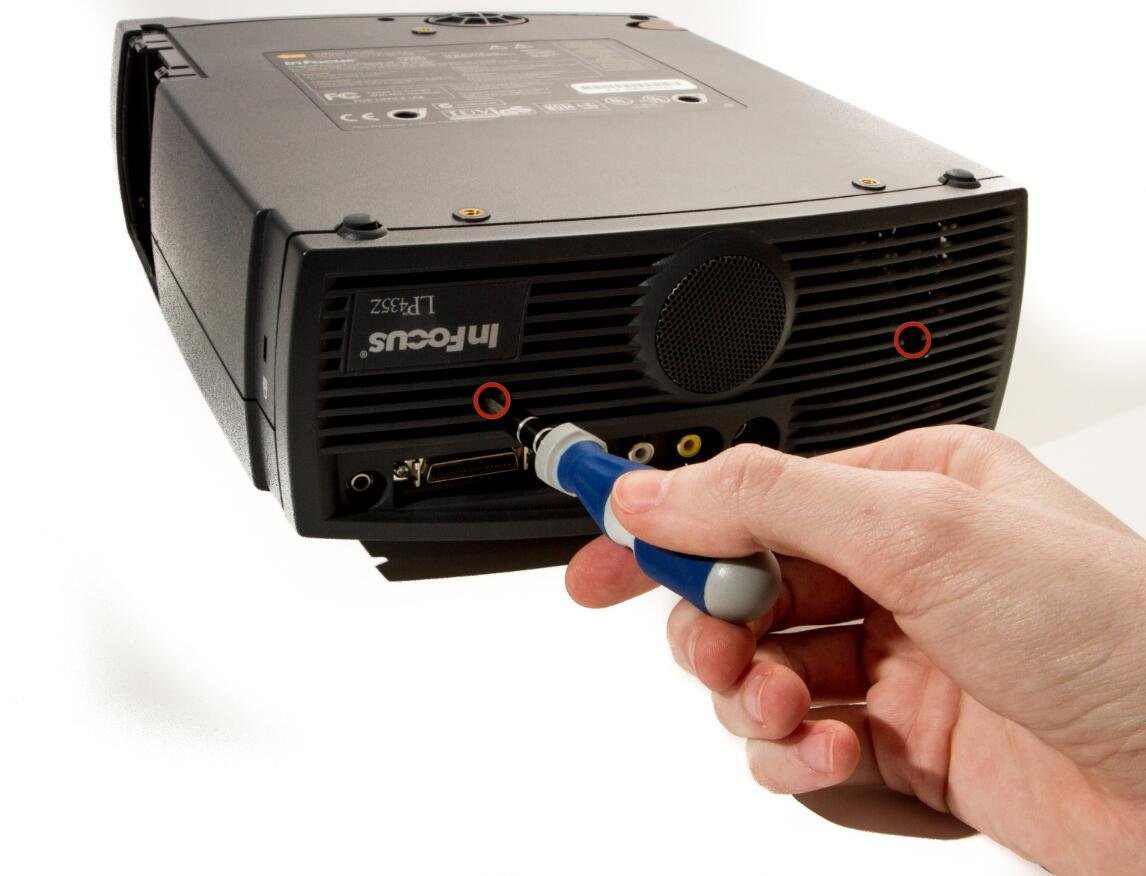
l Flip the projector over and turn around so that the lens faces you.
l Twist the gray zoom adjustment ring clockwise and extend the lens all the way out, and then slide the zoom adjustment ring all the way towards the end of the lens as far as it will go.
l Slide the front case plate towards the loosened zoom adjustment ring, until the top plate of the projector is freed from underneath the lip of the front case plate.
The front case plate will not come all the way off due to the zoom adjustment ring obstructing it. It will merely slide forward a bit.
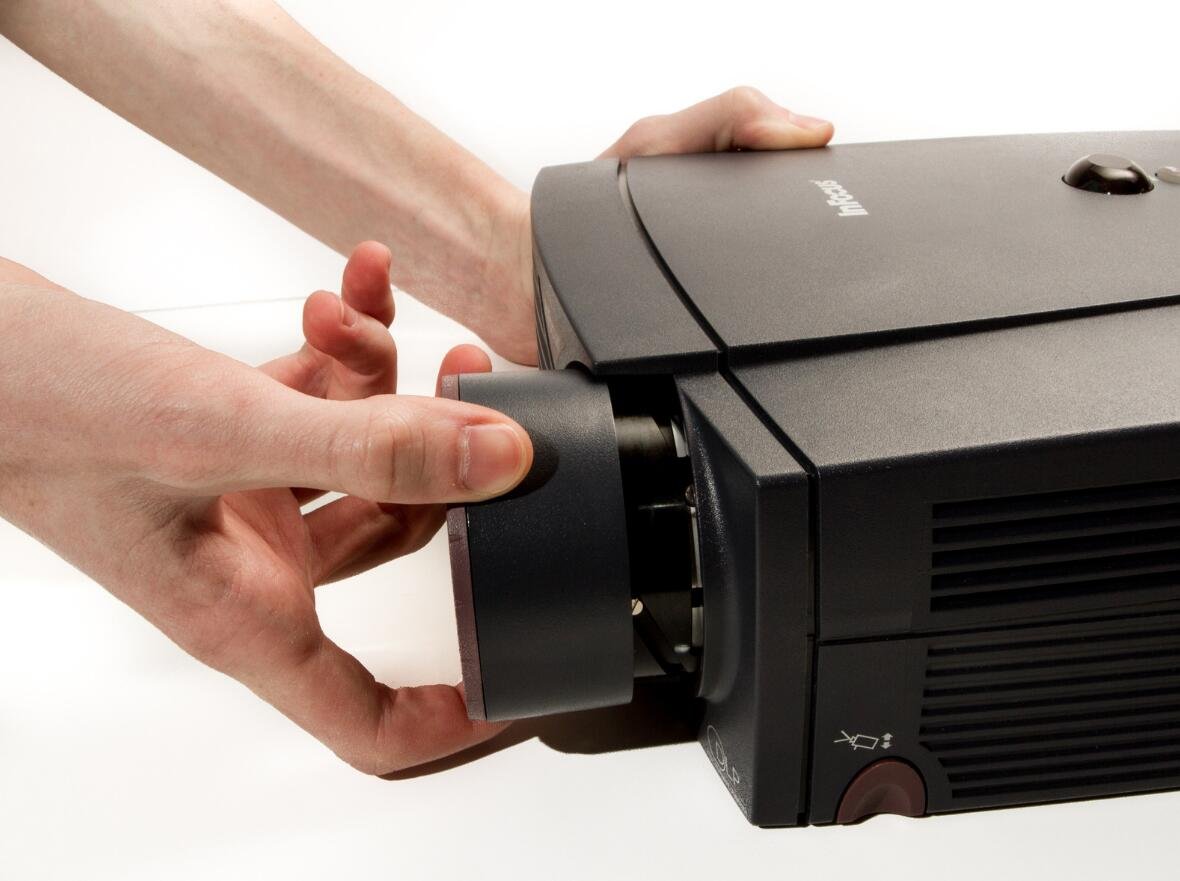
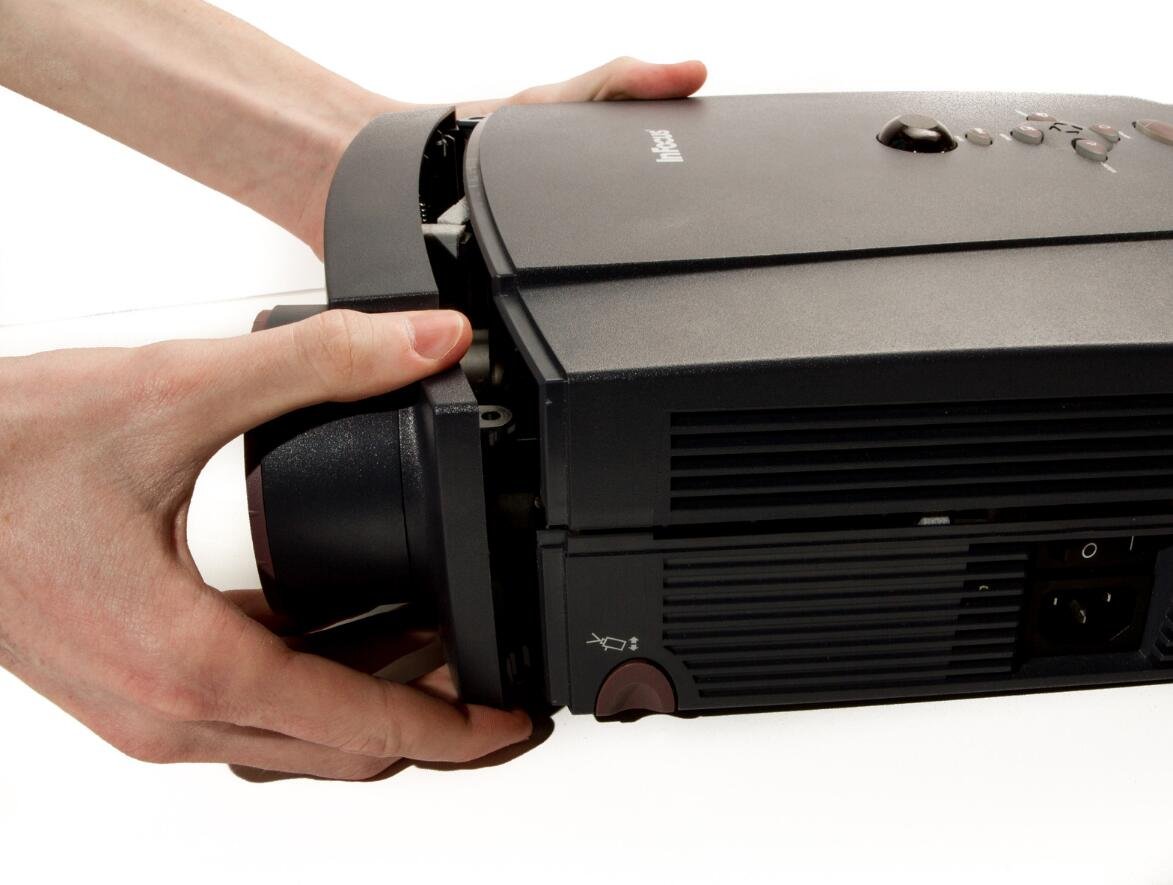
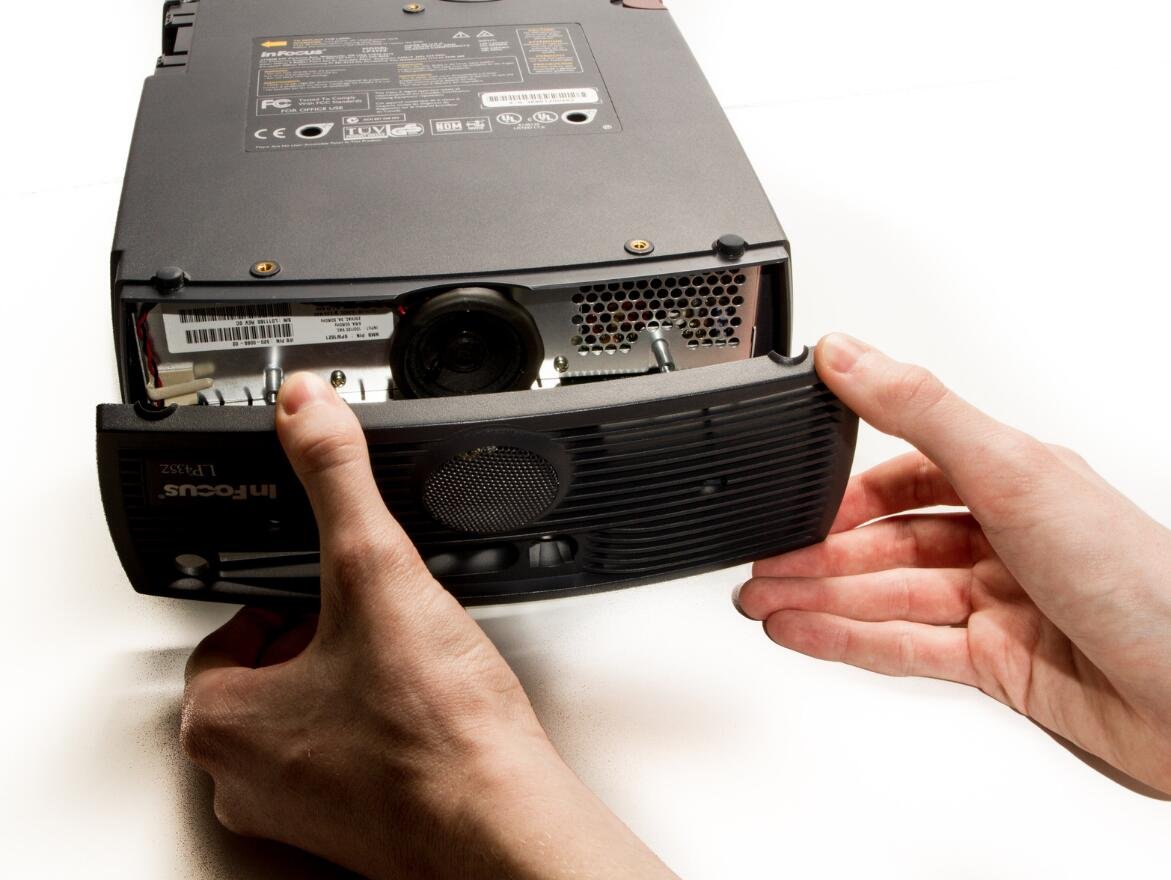
Step 5
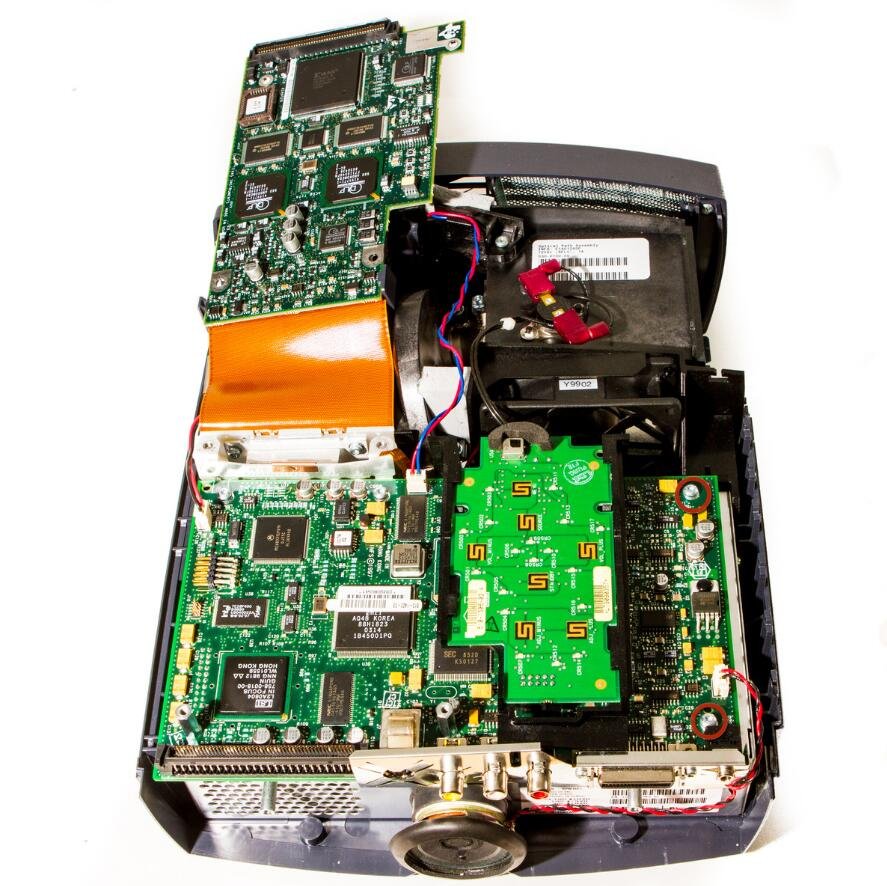
l Lift away the top case plate and set it aside.

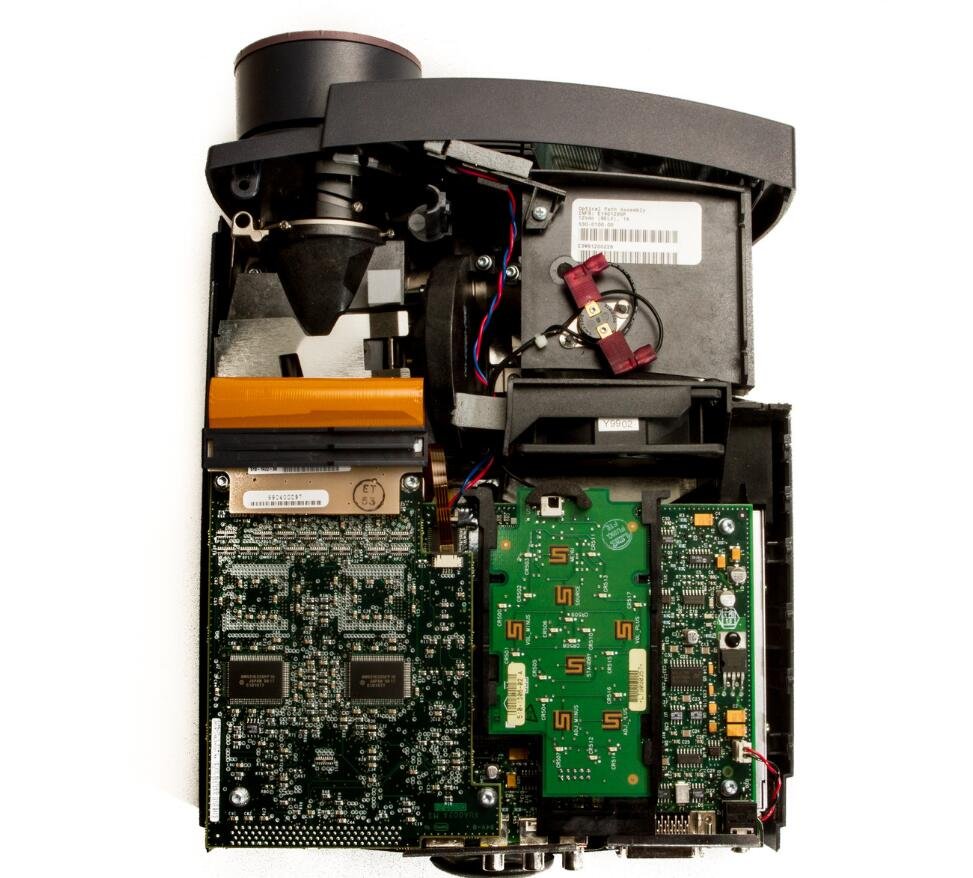
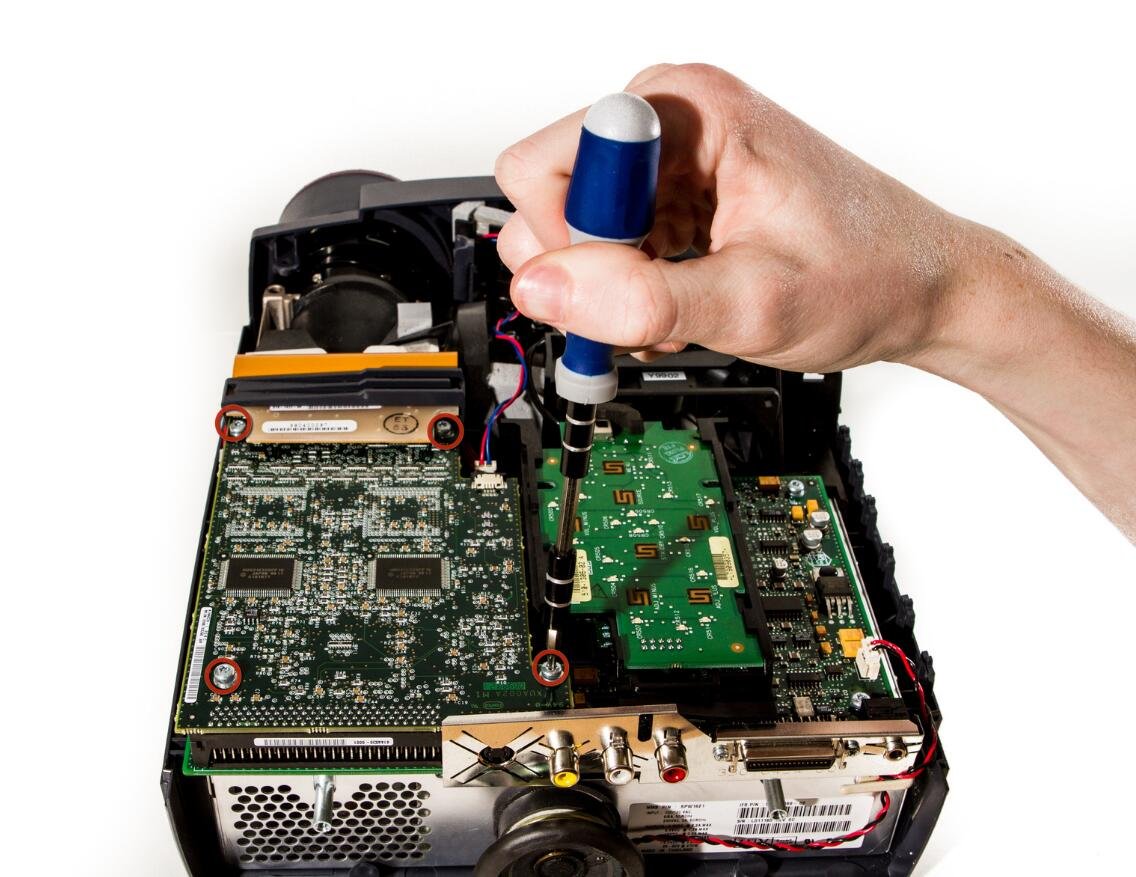
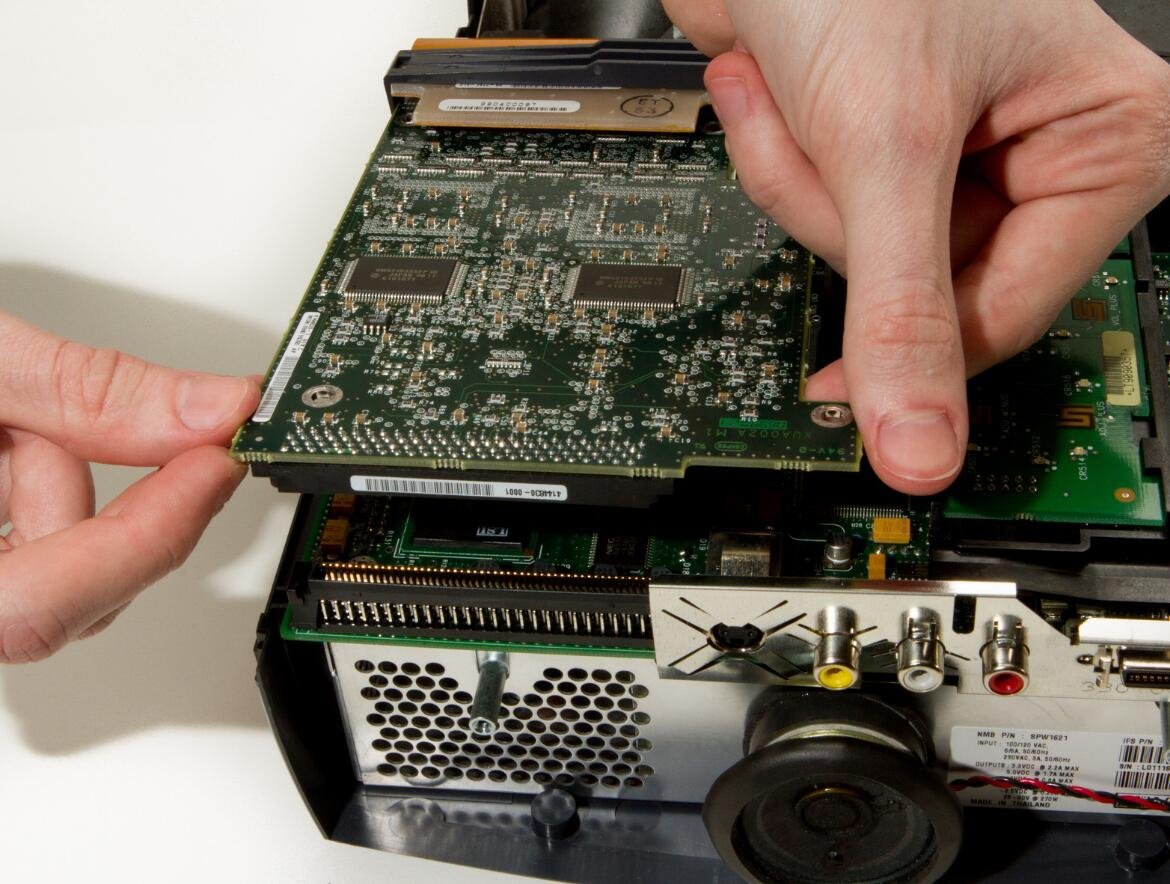
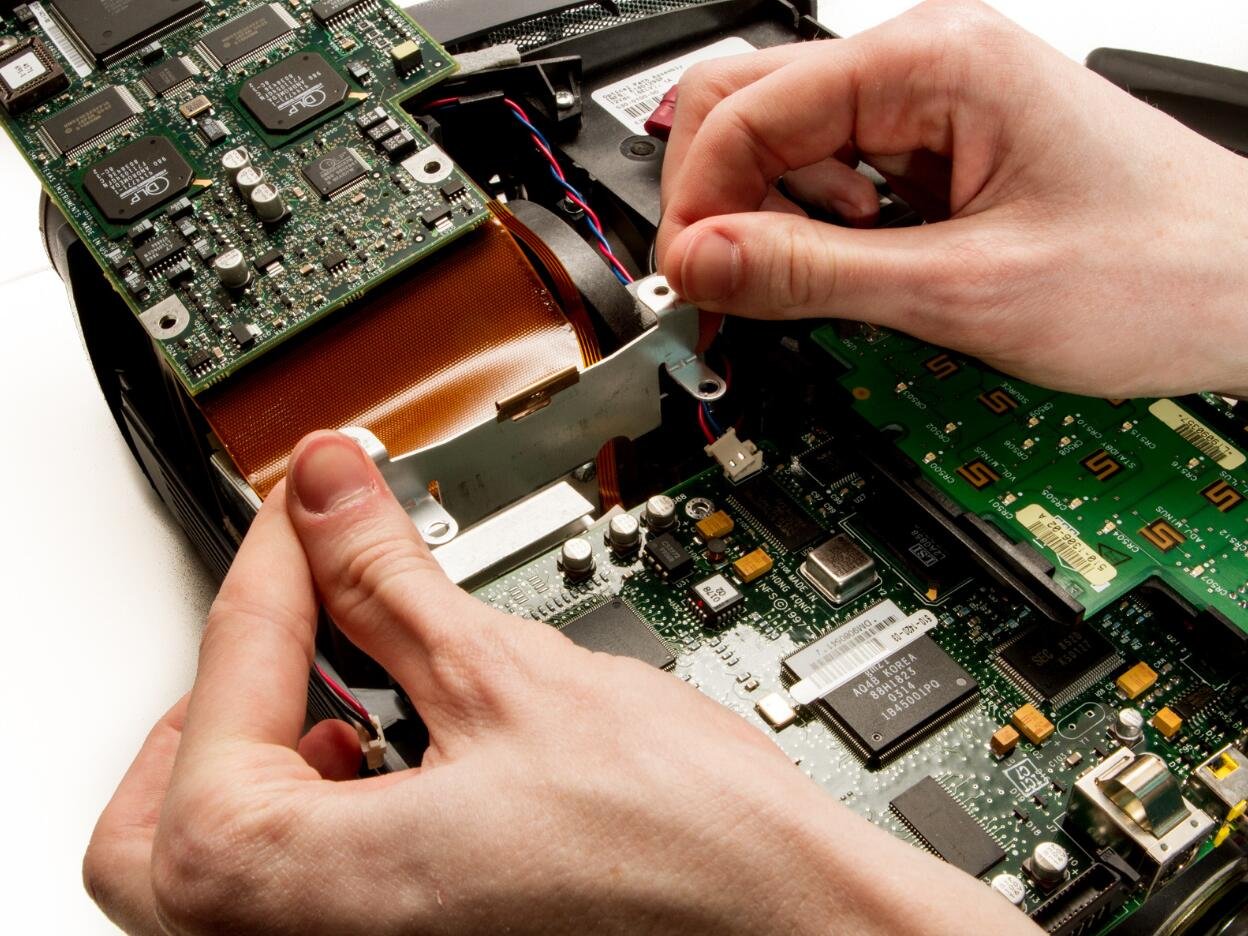
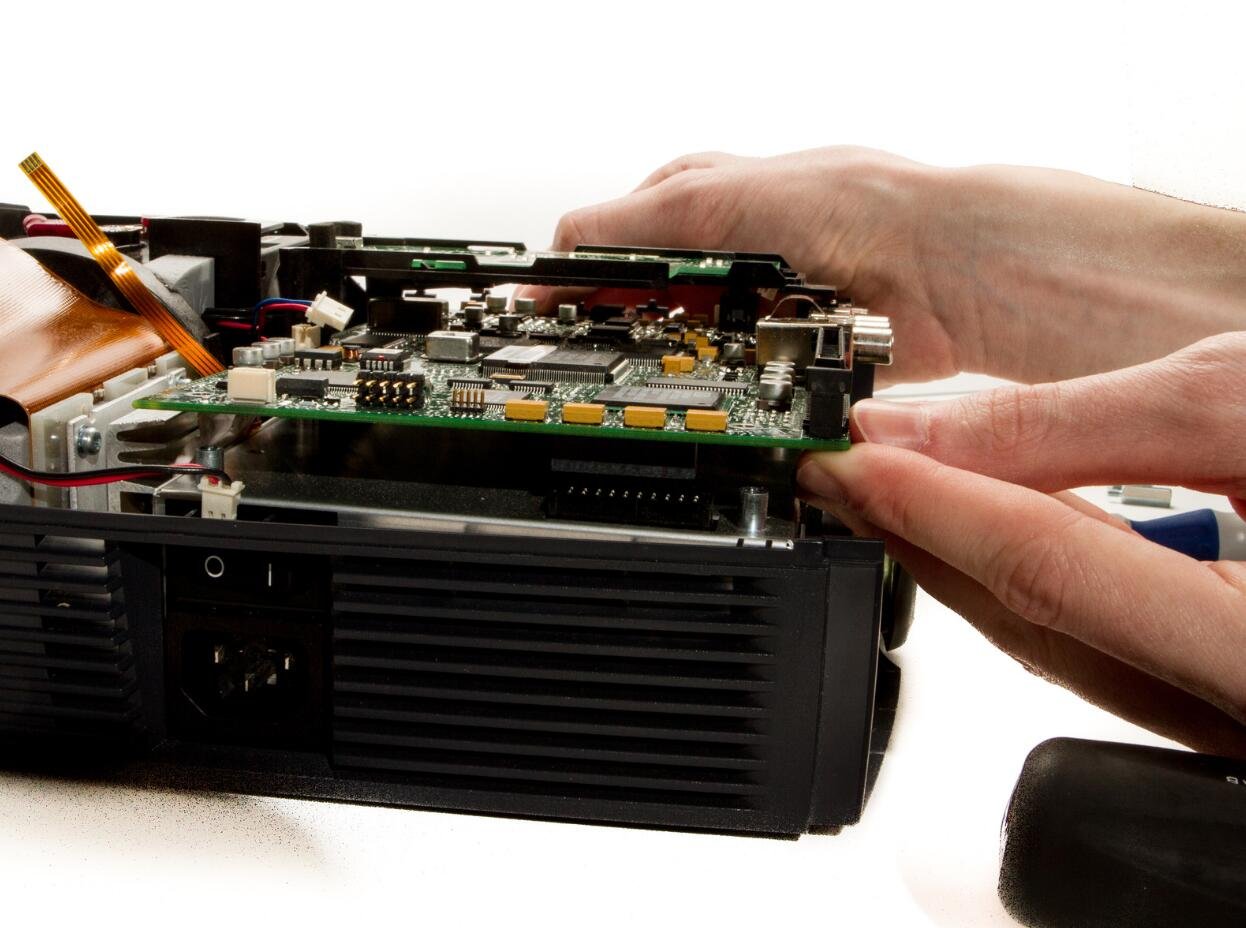
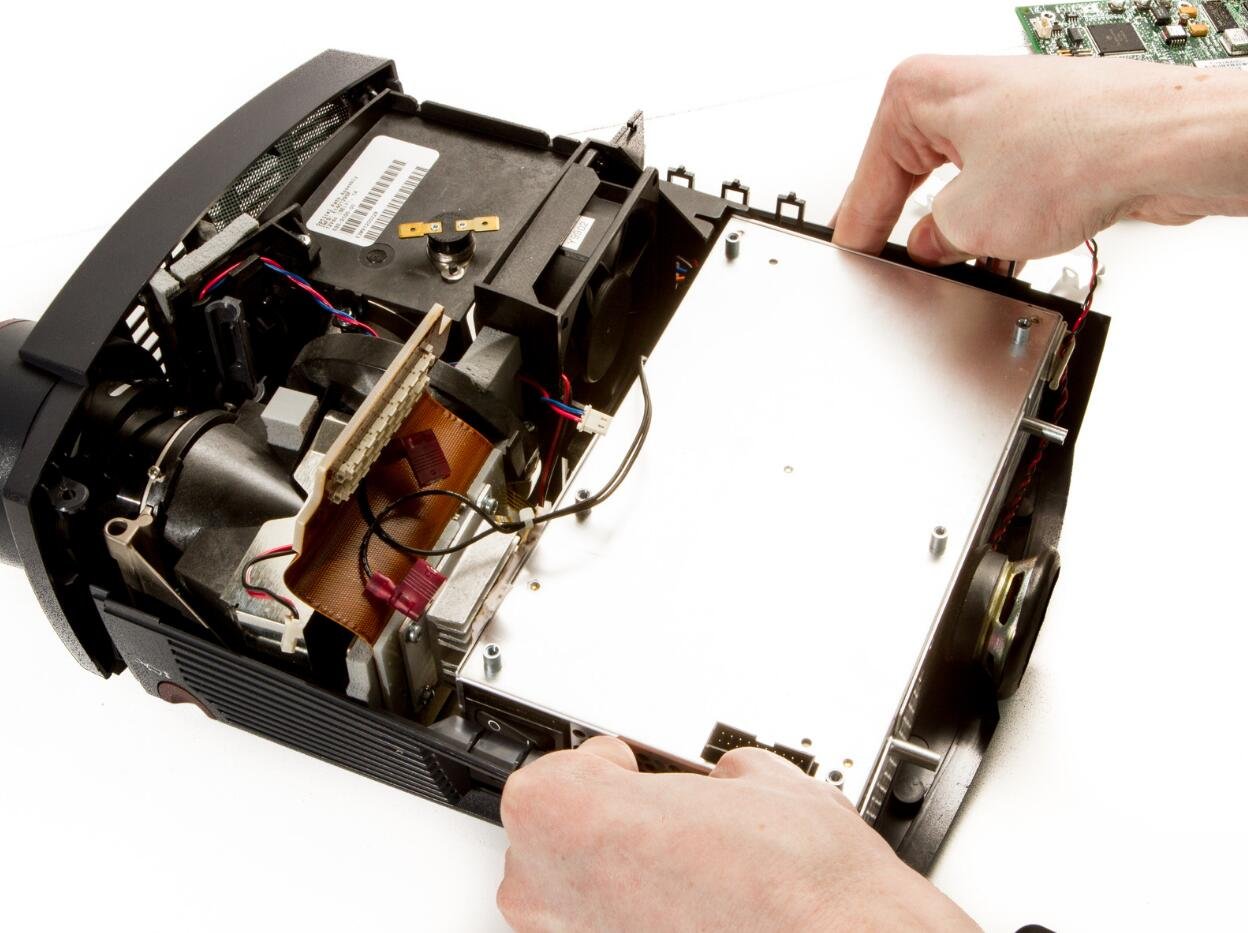
Step 6 Main Fan
l Remove the four T10 Torx 8.5 mm screws holding the DLP board in place.
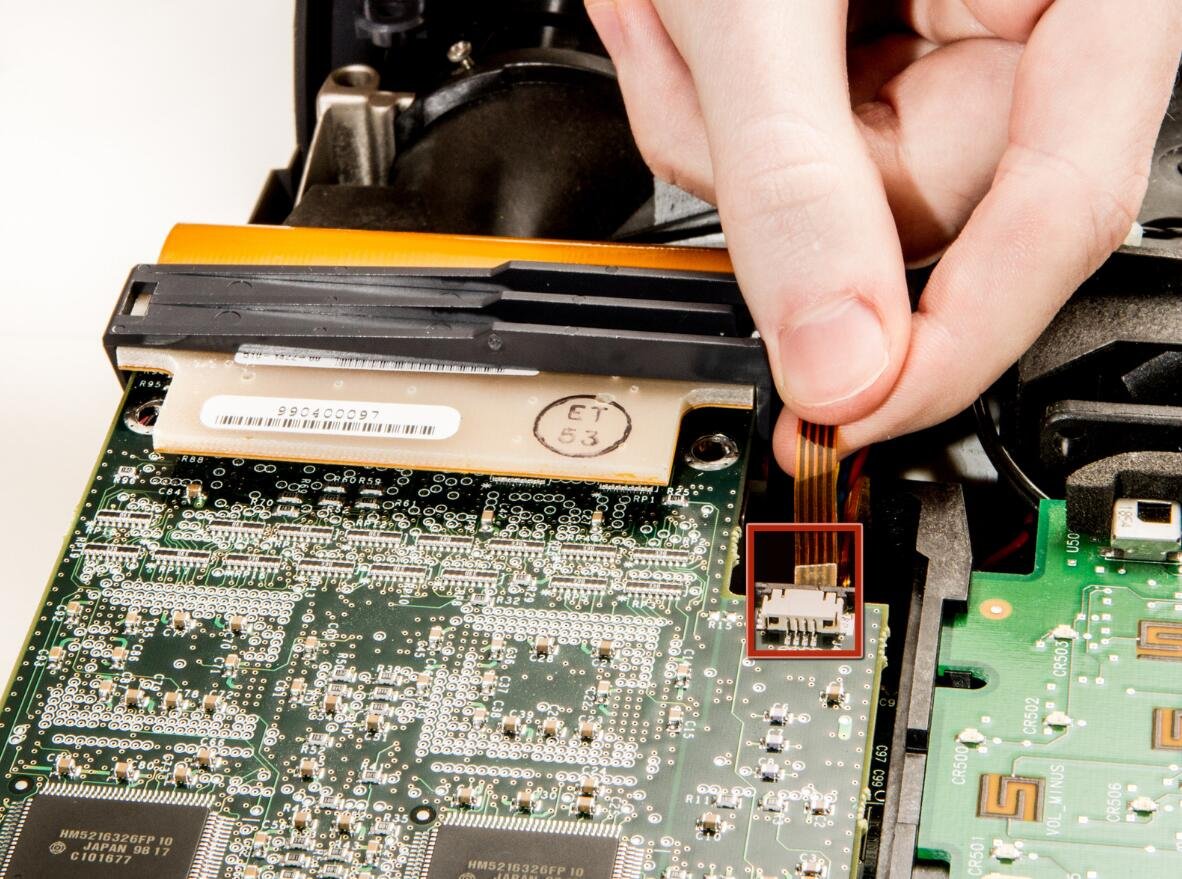
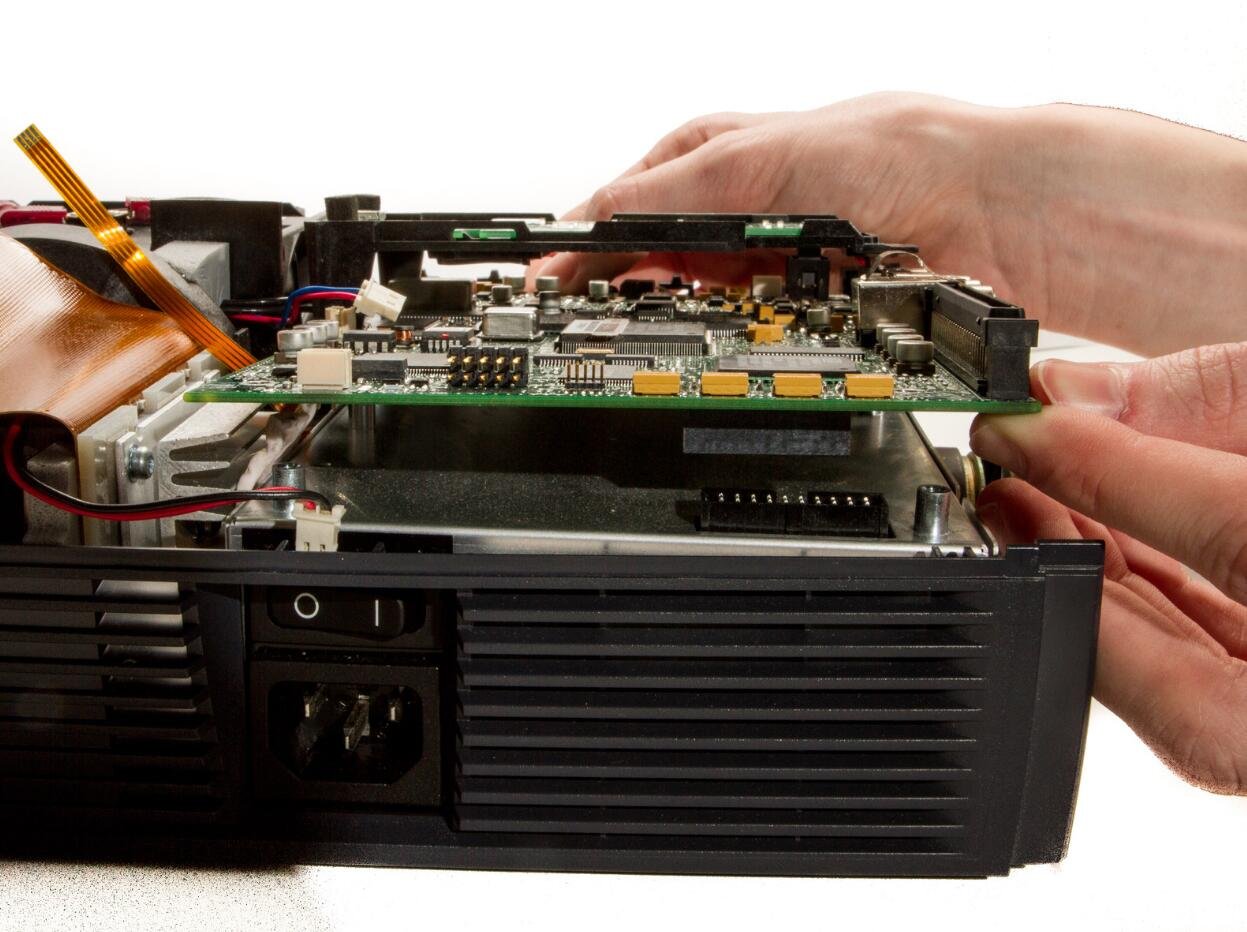
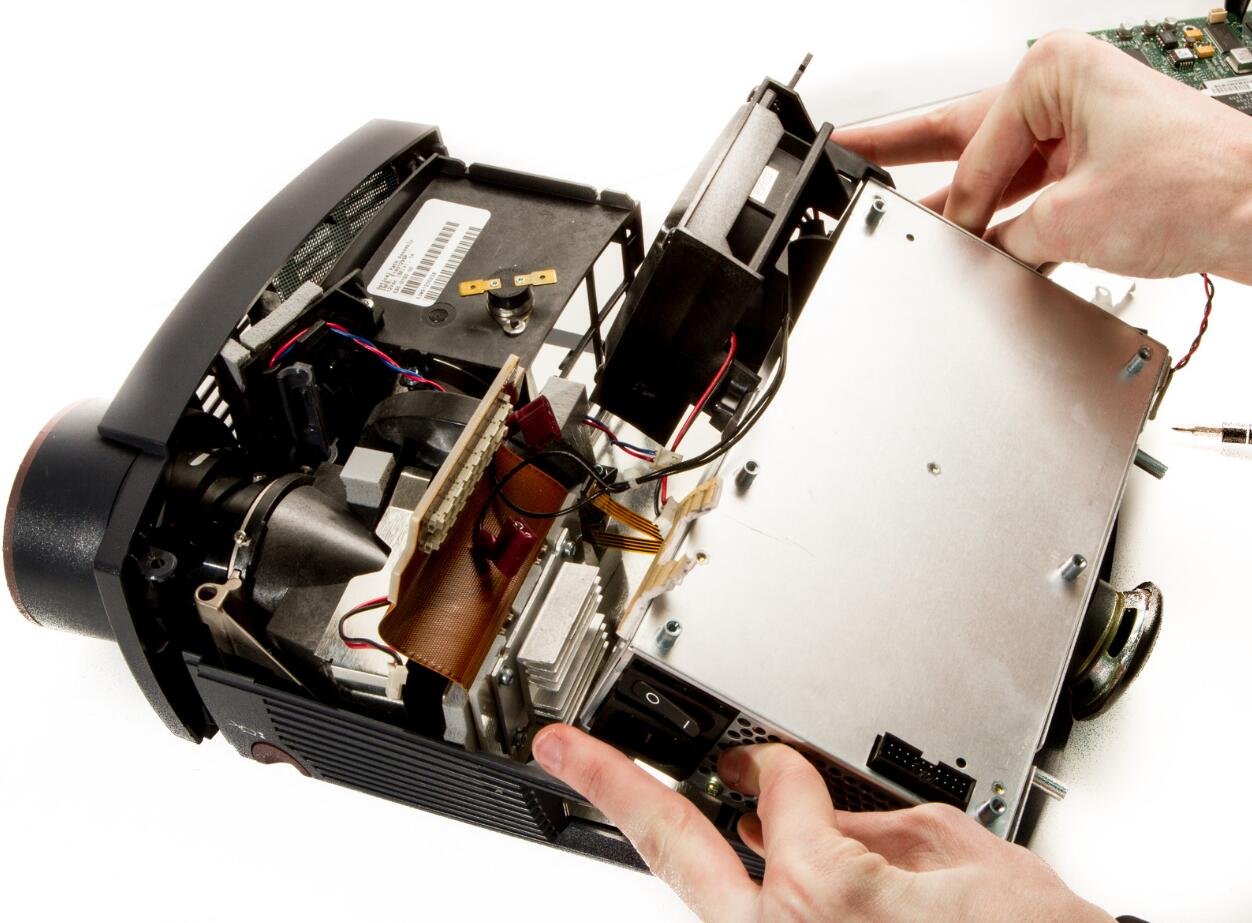
Step 7
l Unplug the small ribbon cable attaching the DLP board to the motherboard.
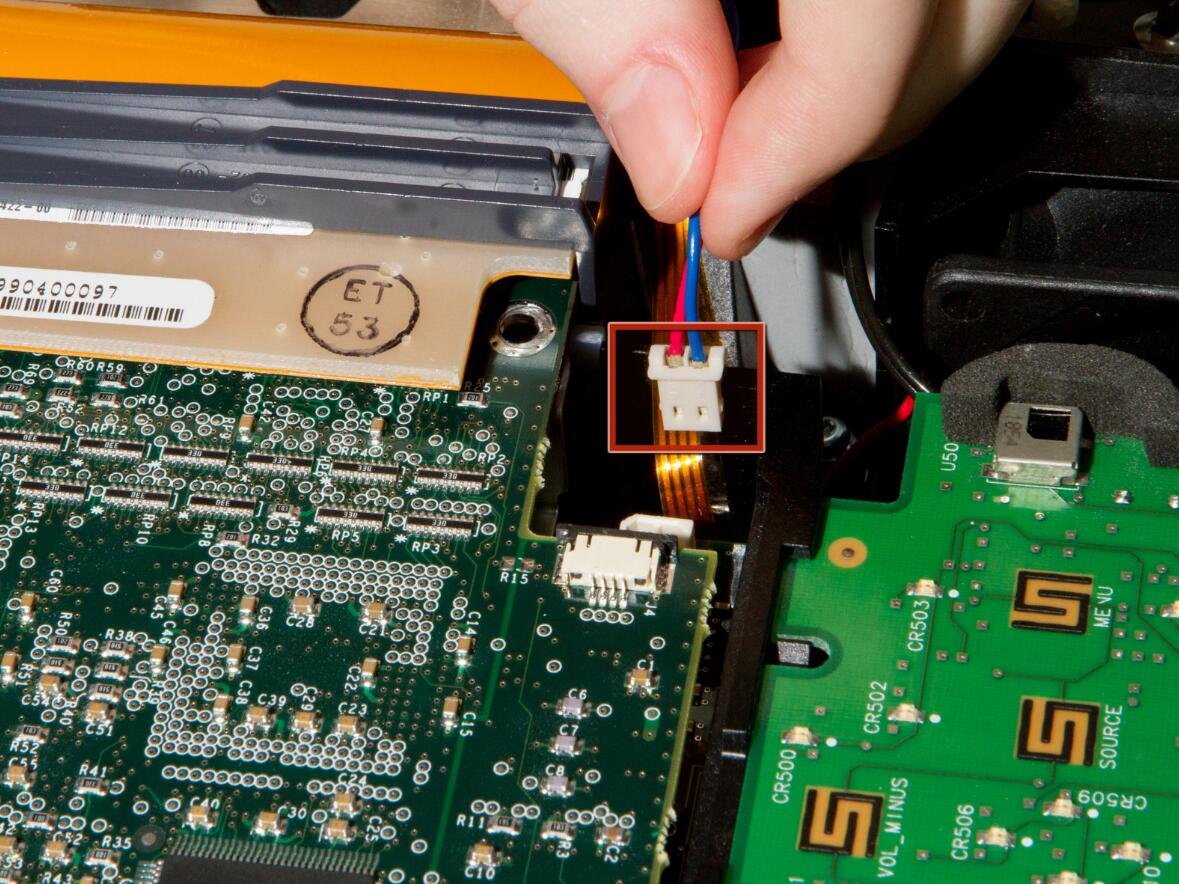
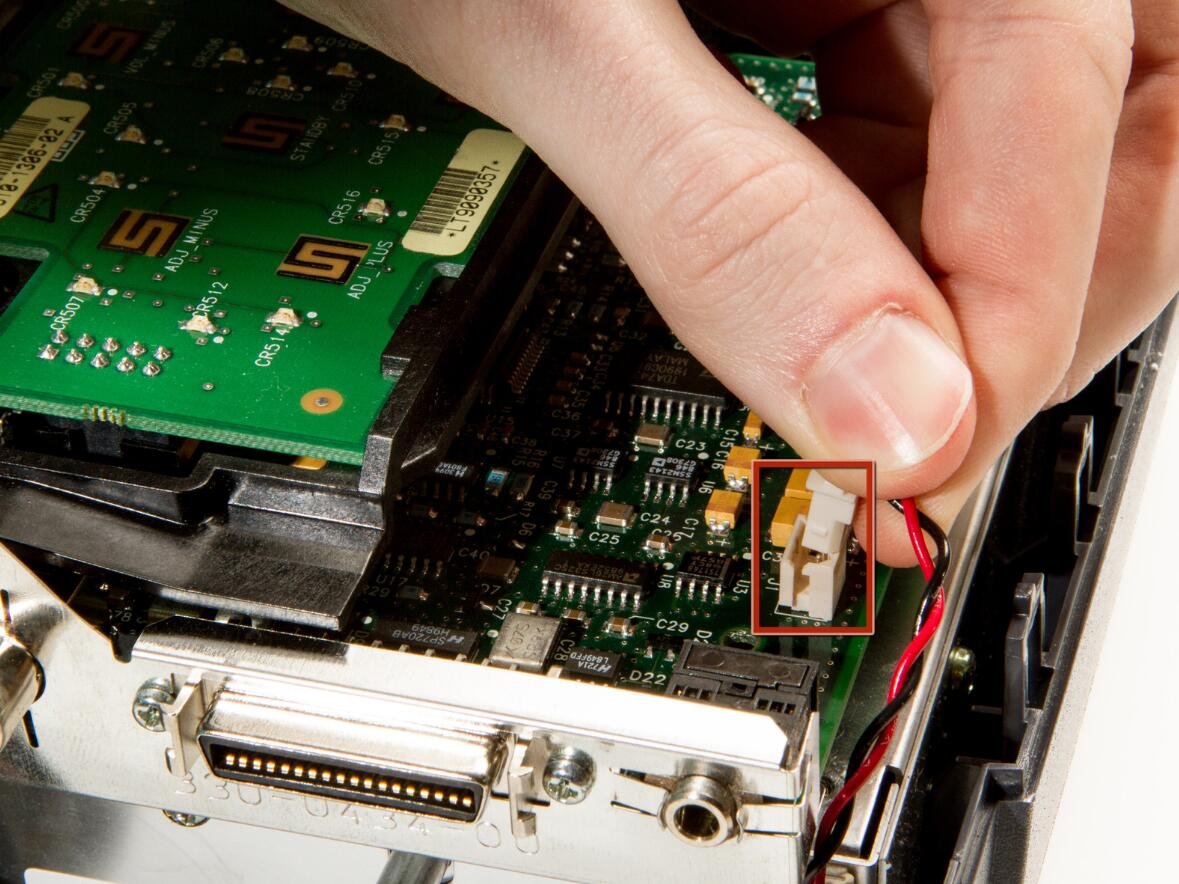
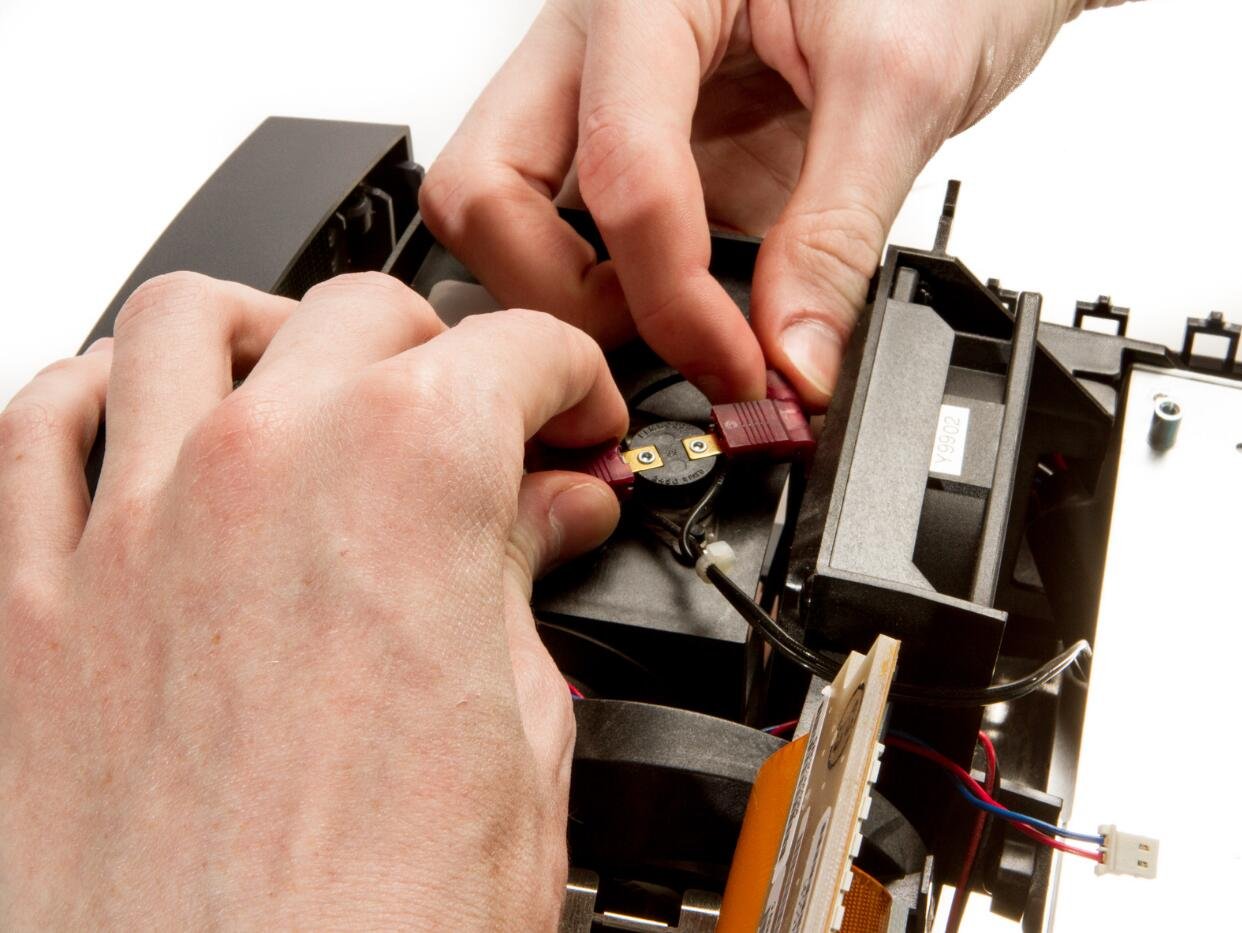
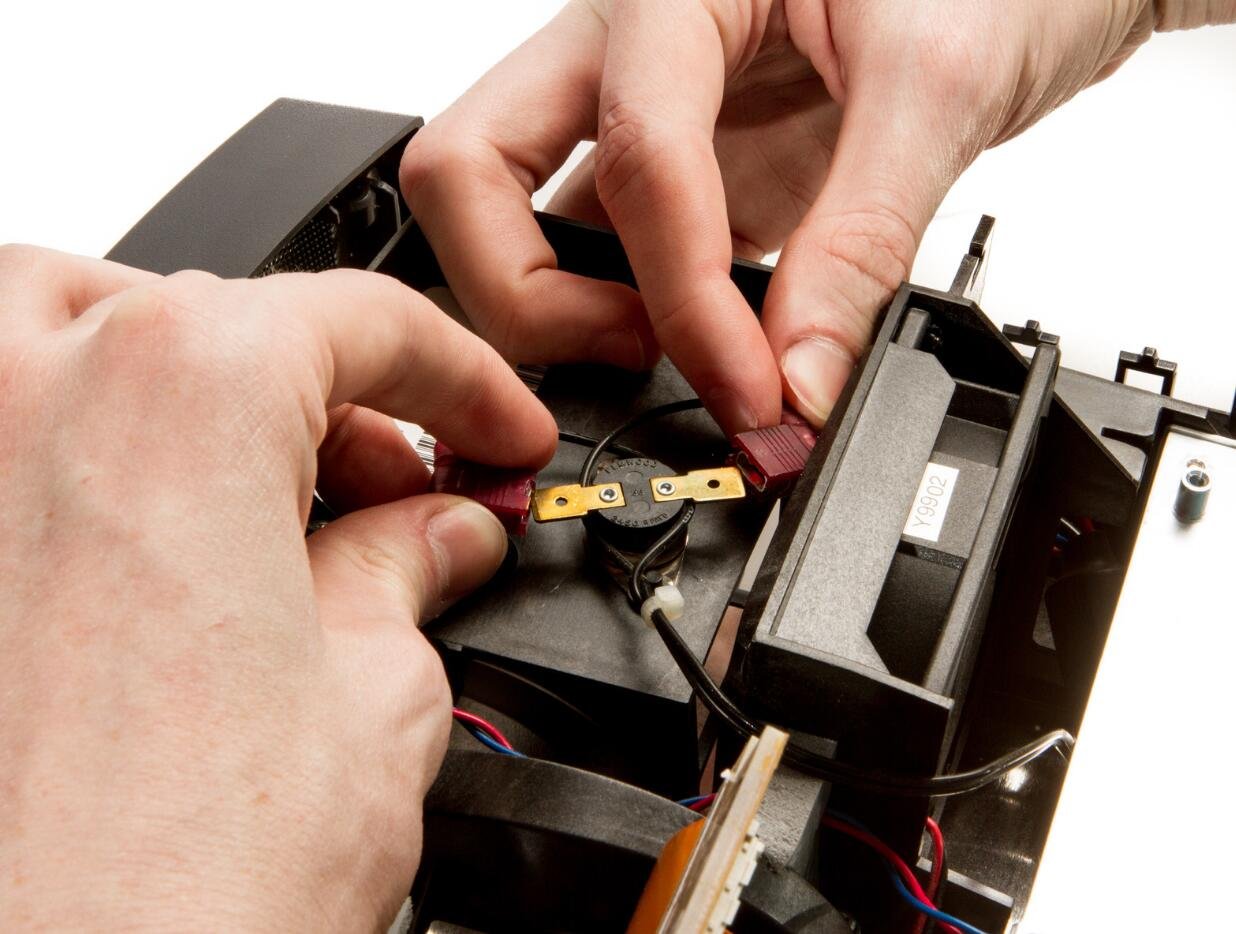
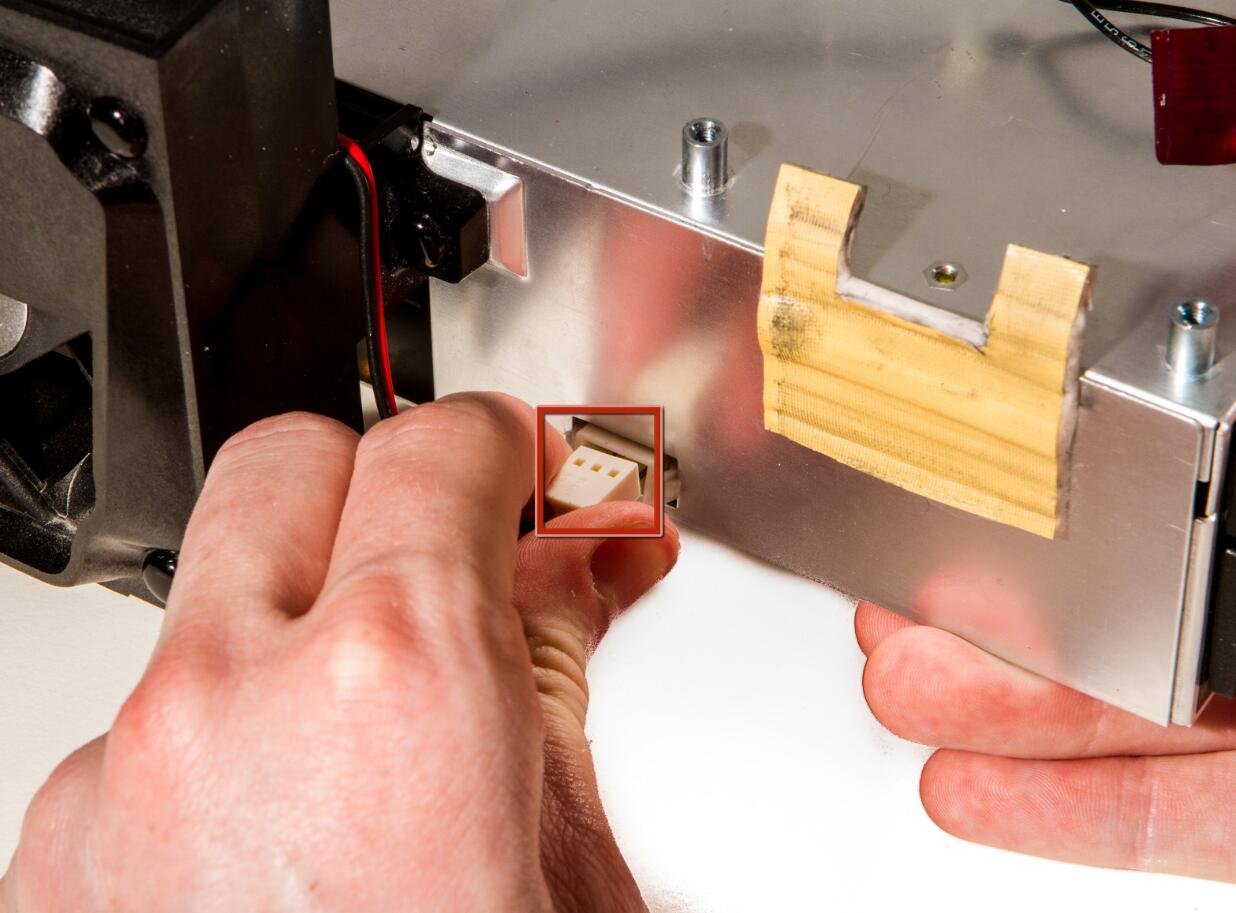
Step 8
l Remove Secondary Fan Cable
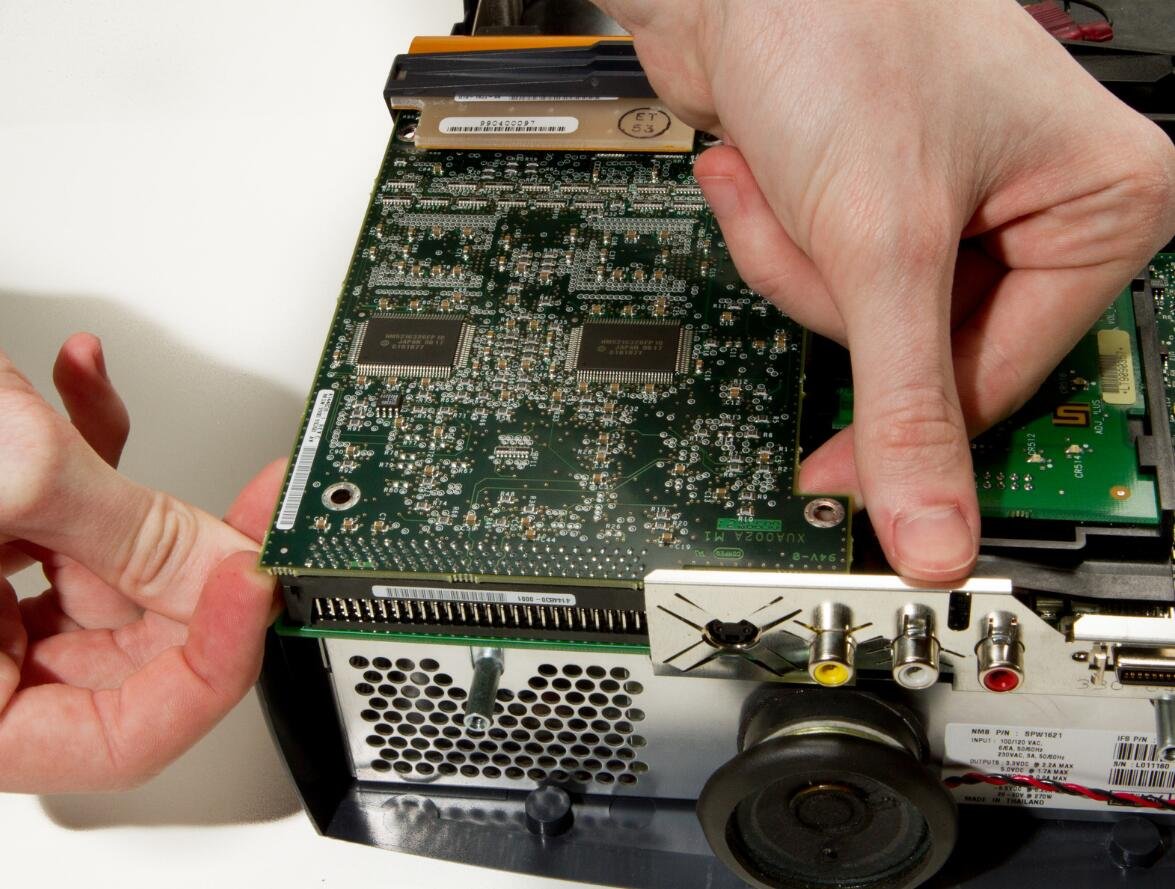
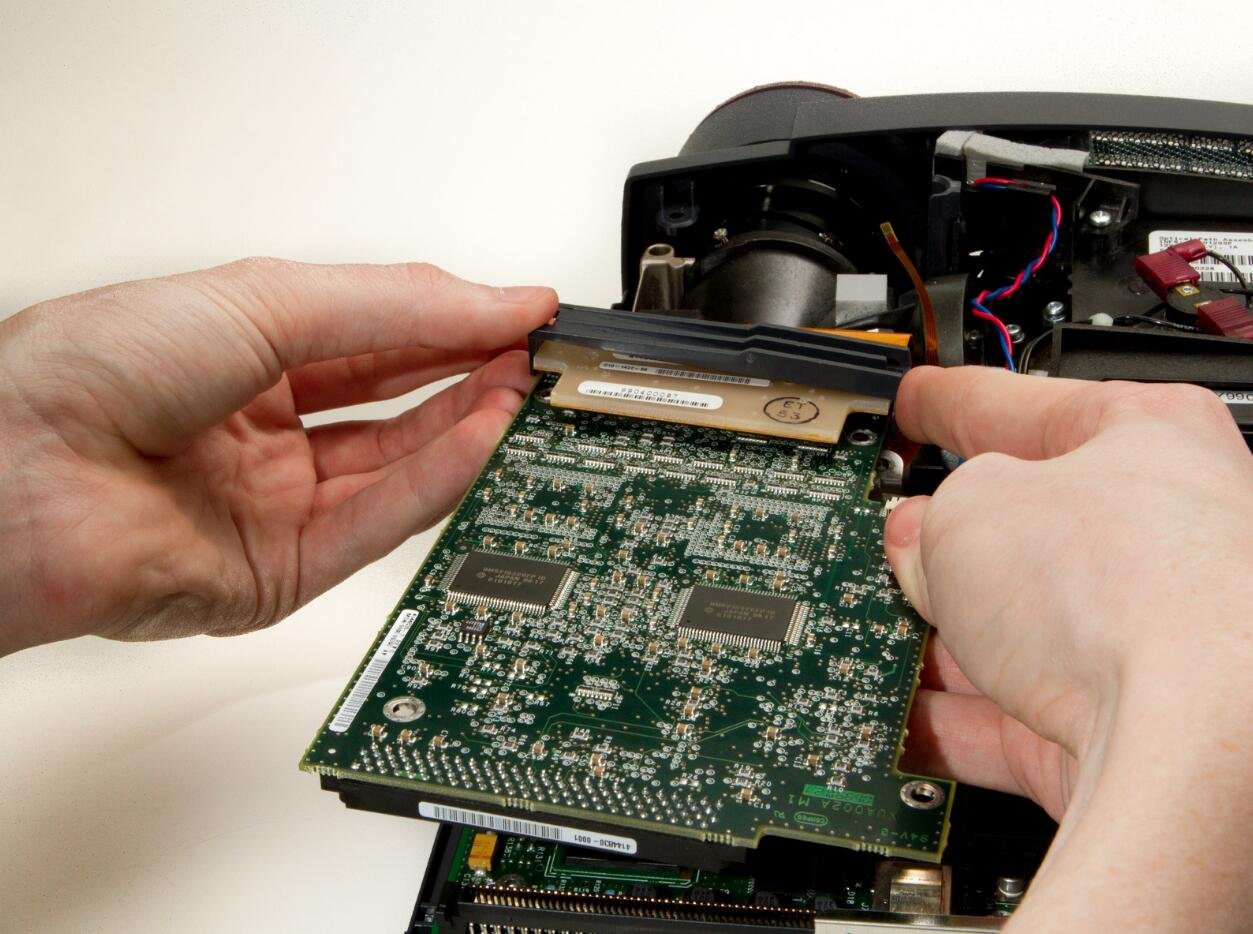
Step 9
l Detach the DLP board from where it is connected to the motherboard by a large 100 pin connector.
l Pry up gently while wiggling from left to right if needed.
The ribbon cable on the other side of the board could break if pulled too hard.
Step 10
l Remove the 2 remaining T10 Torx 8mm screws securing the motherboard to the power supply.
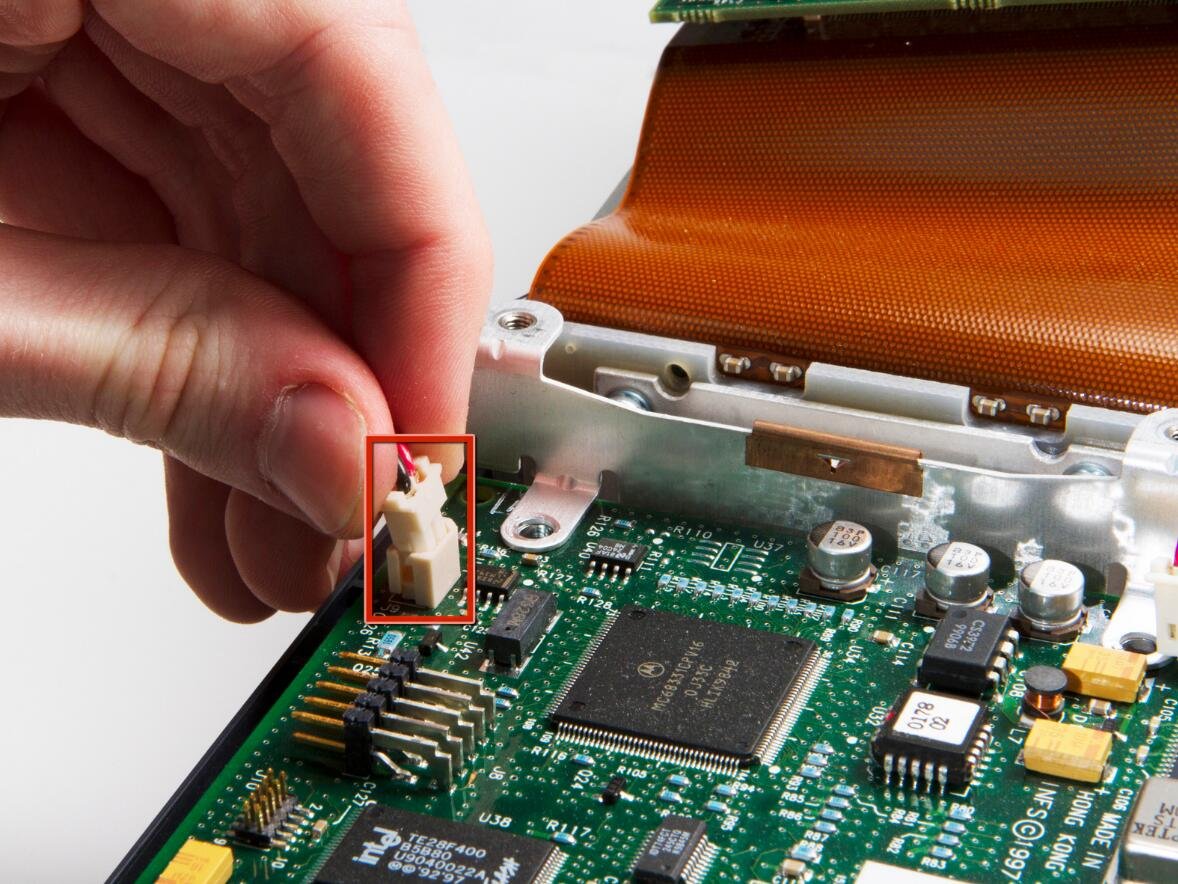
Step 11
l Remove the speaker power cable.
Step 12
l Remove DLP Power Cable.
Step 13
l Pry out the DLP support piece by gently wiggling it side to side while applying a steady pull. It will slide out.
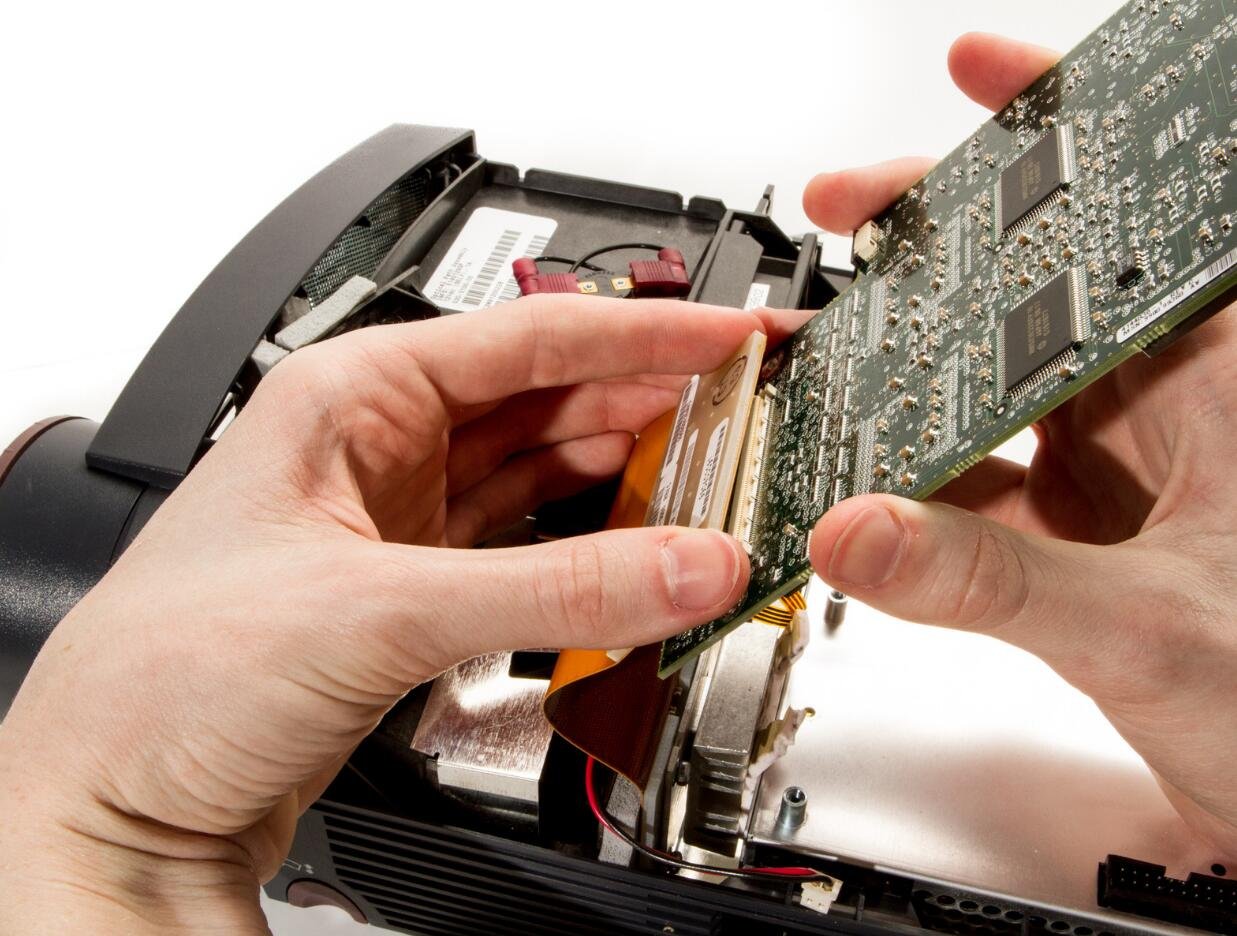
Step 14
l Remove the black plastic retaining clip reinforcing the large ribbon cable connector by prying it from the left edge.
l Gently pry the large ribbon cable connector from the DLP board, and remove the board.
Using too much force could damage the connector.
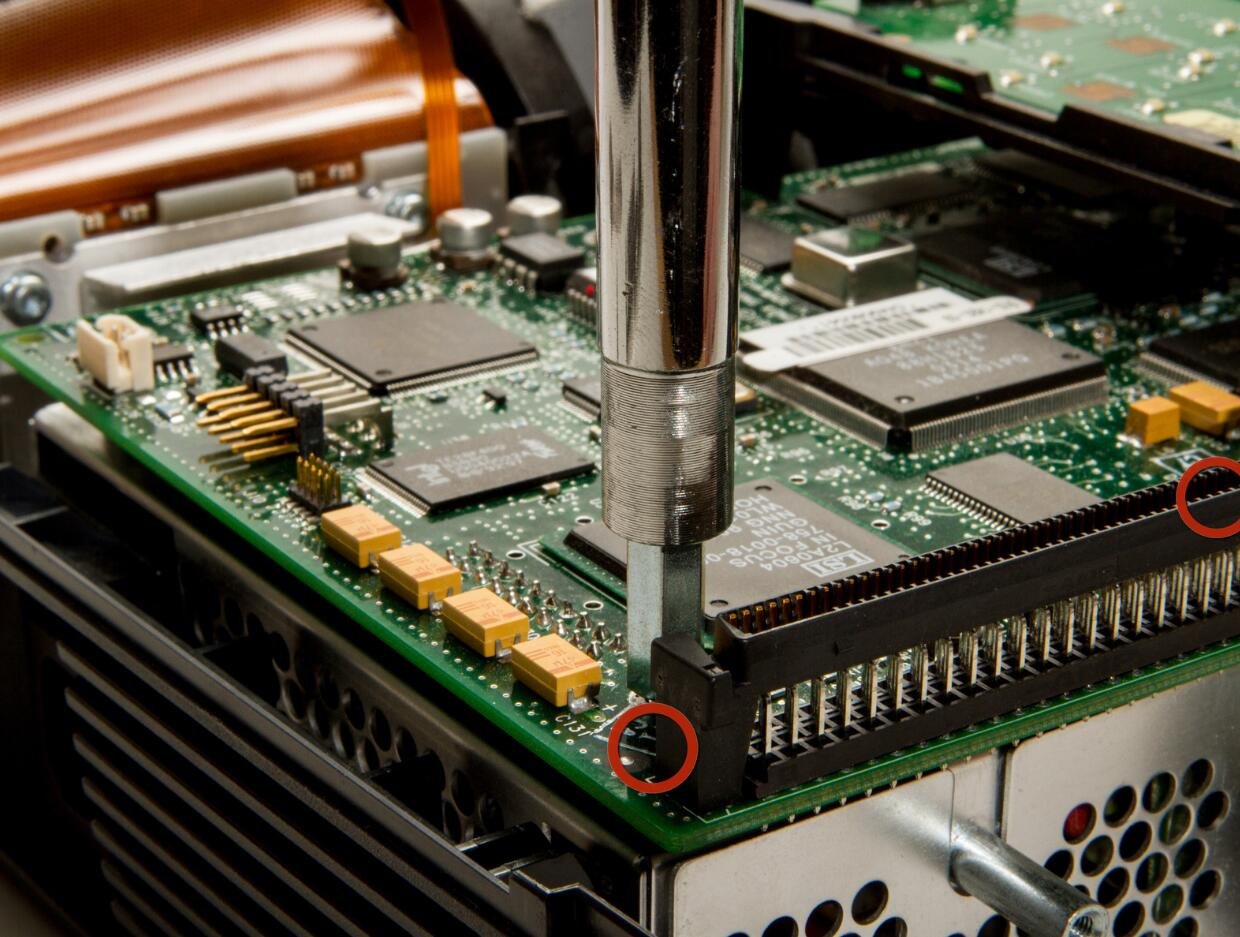
Step 15
l Remove the two 1/4" screws using the nut driver.
l The second screw is located behind the right side of the 100 pin connector.
l Gently pry up the motherboard from the connector on top of the power supply.
Step 16
l Disconnect the lamp power supply cables from the top of the lamp housing, by gently pulling the two wires in opposite directions.
Step 17
l Use your thumbs to pry the sides of the external shell away from the power supply so it can be lifted out.

Step 18
l Detach the main fan power cable from the power supply.
Step 19
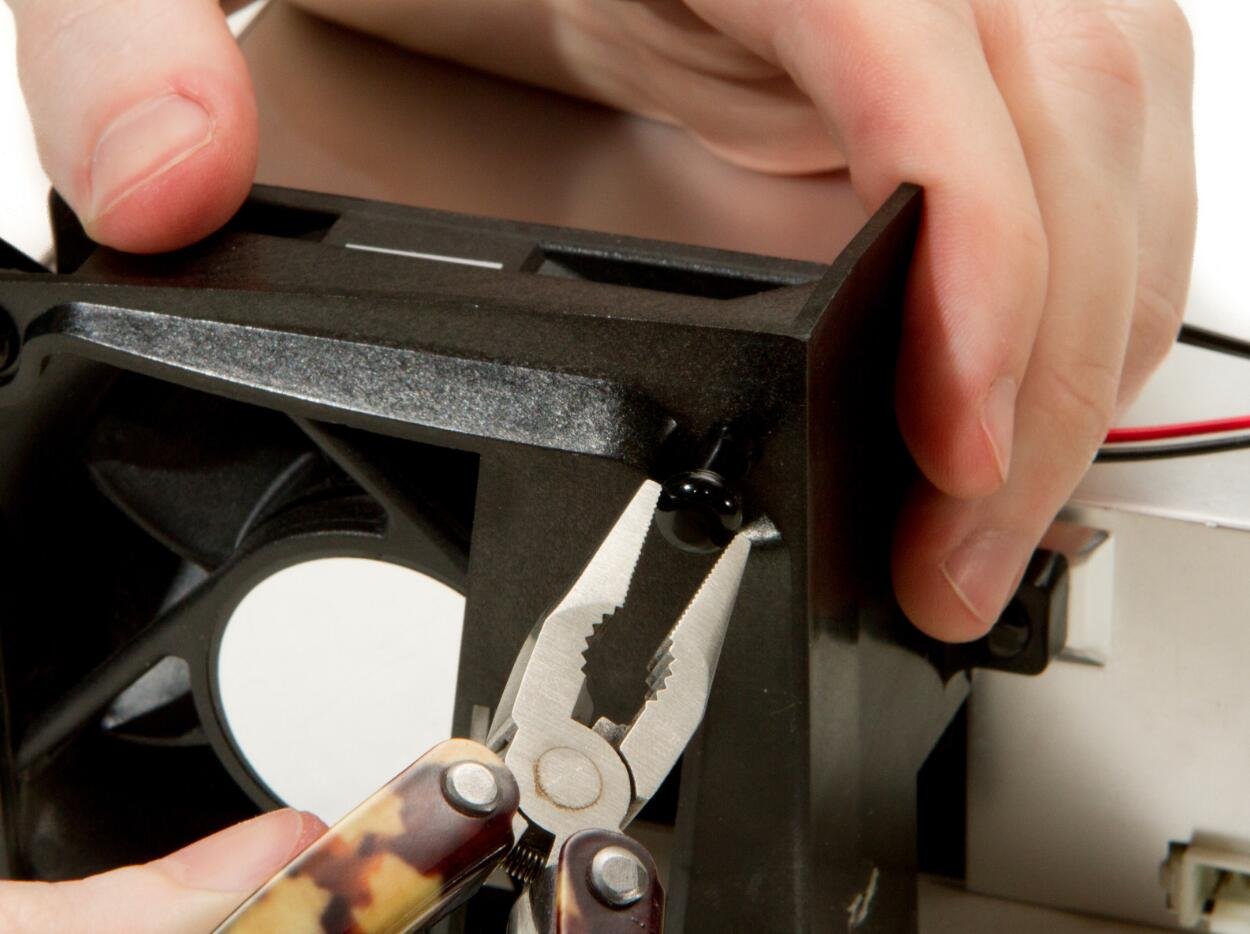
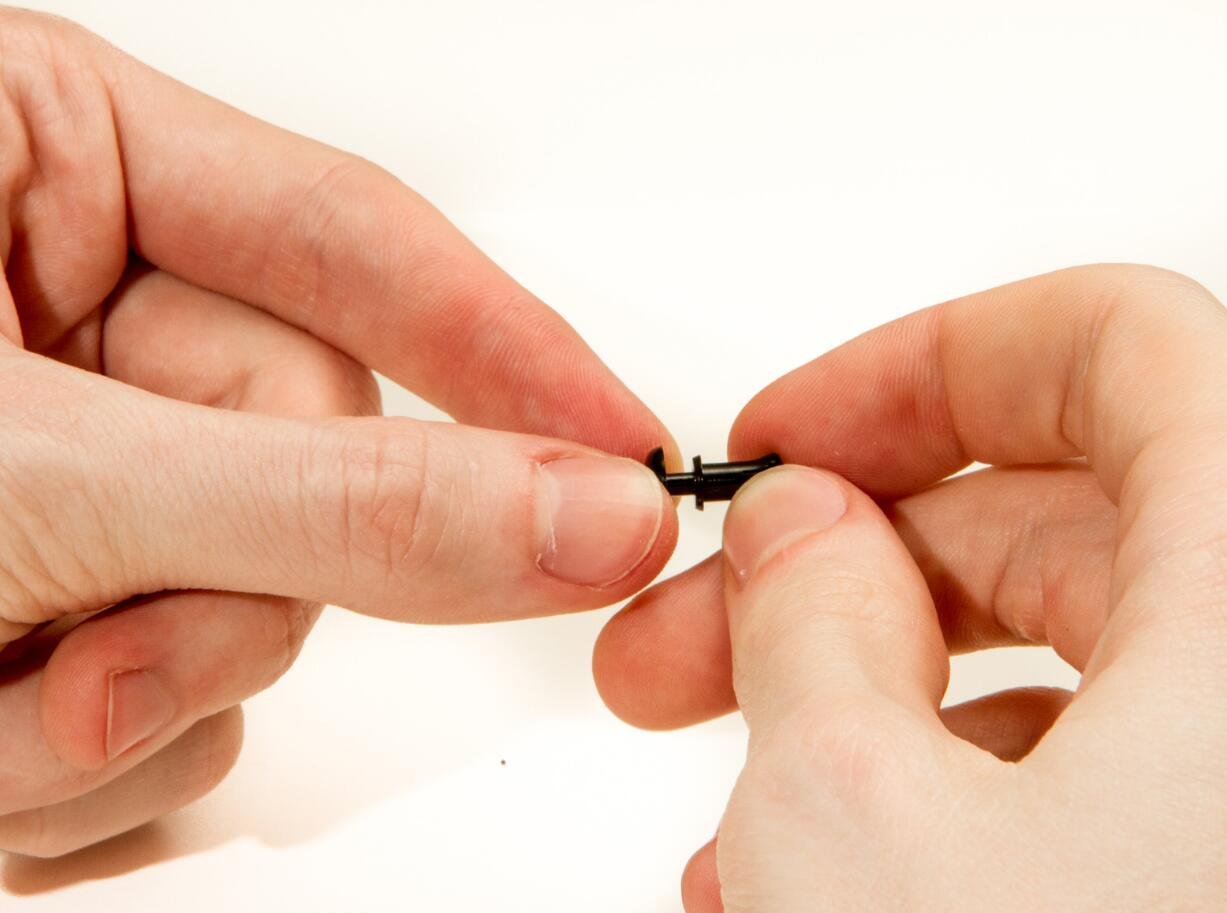
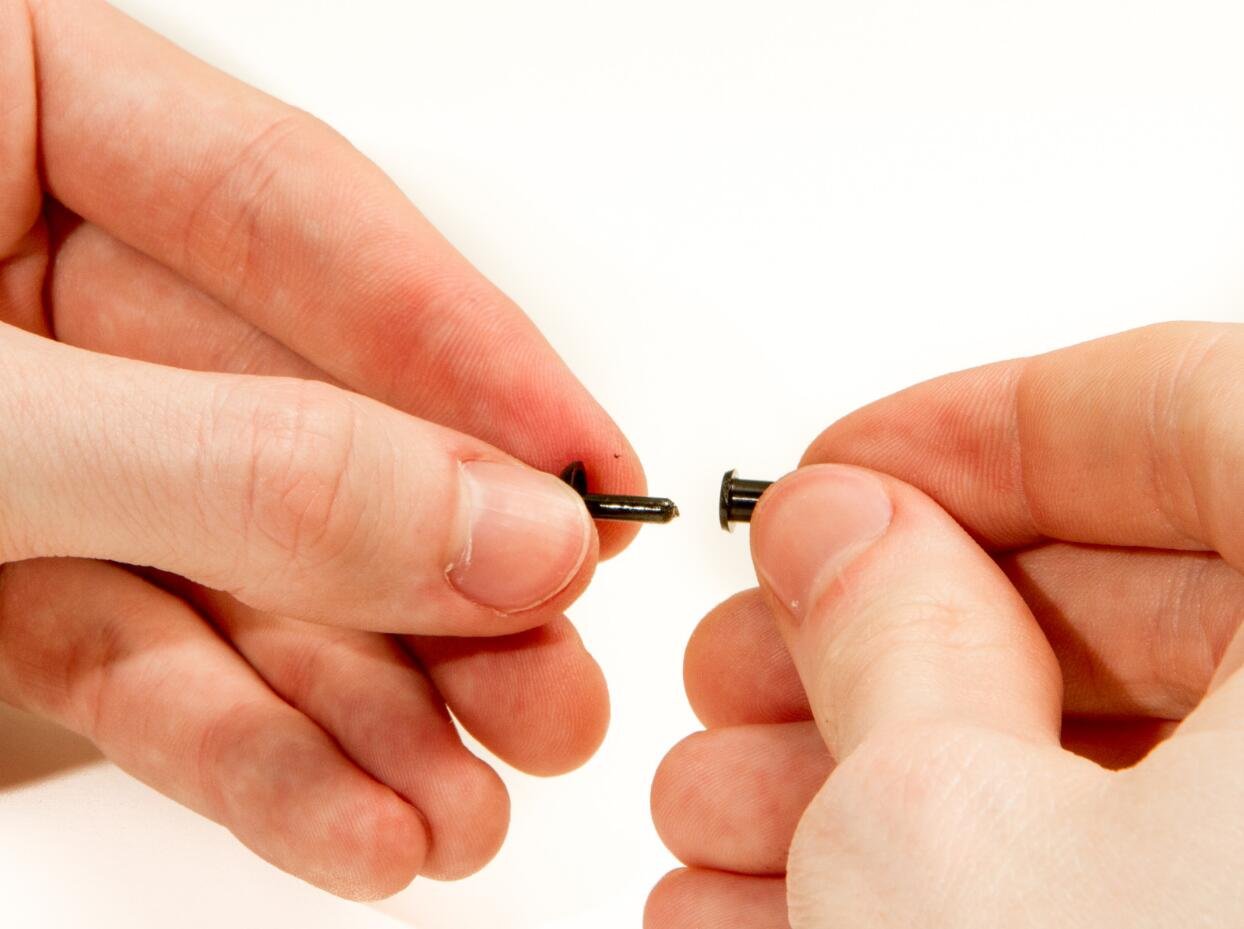
l Use the needle nose pliers to pull out the grommets securing the main fan to its housing.
To replace grommets, pull the center pins from their housing, and slip the exteriors of the grommets back into their holes in the fan housing, then push the centers in to secure them in place.
Step 20
l Remove the fan from its housing.